Now that your website is registered with Deflect, it’s time to initiate the setup process. This involves providing necessary technical information to ensure your website operates optimally on Deflect.
Additionally, it’s important to migrate all existing DNS records to Deflect to maintain your website’s functionality.

Client Survey #
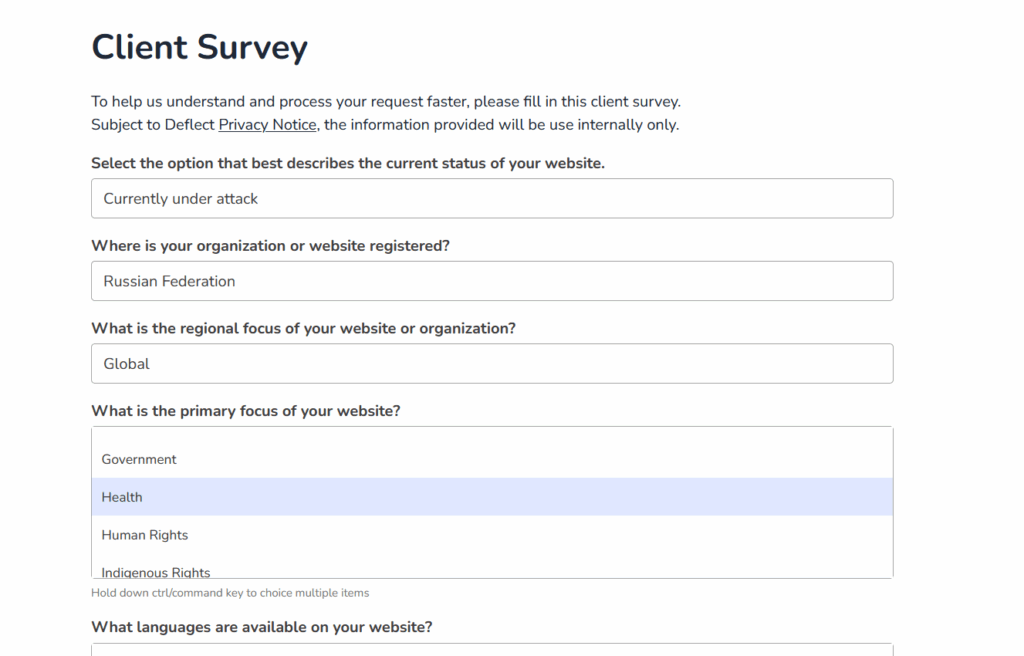
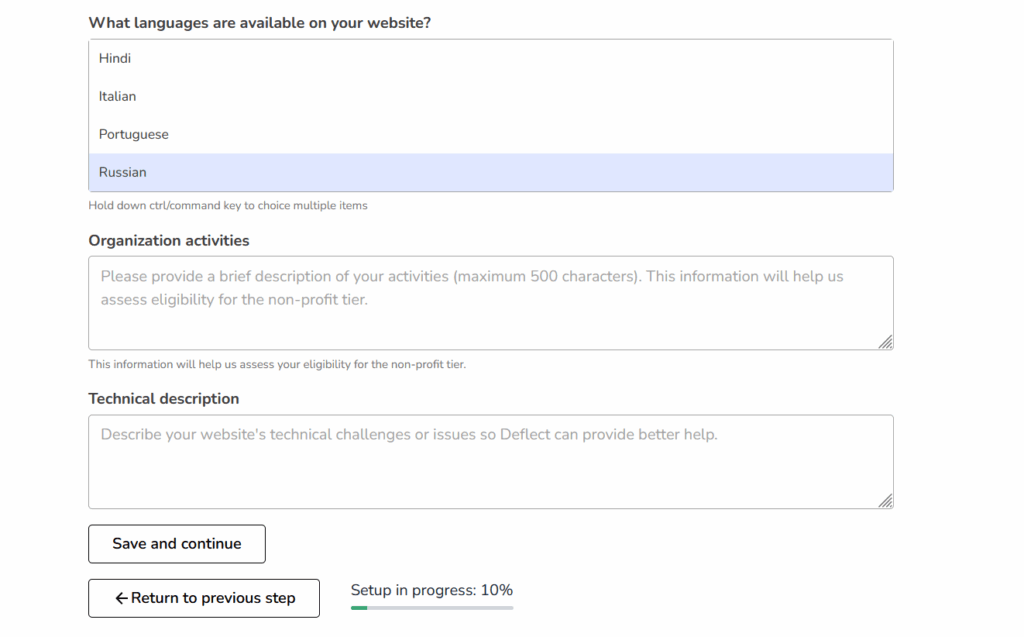
For non-profit clients, we kindly request that you complete a client survey. This helps us ascertain whether your website is eligible for the non-profit tier per our terms of service. Please provide responses to the best of your knowledge.
IP Address #
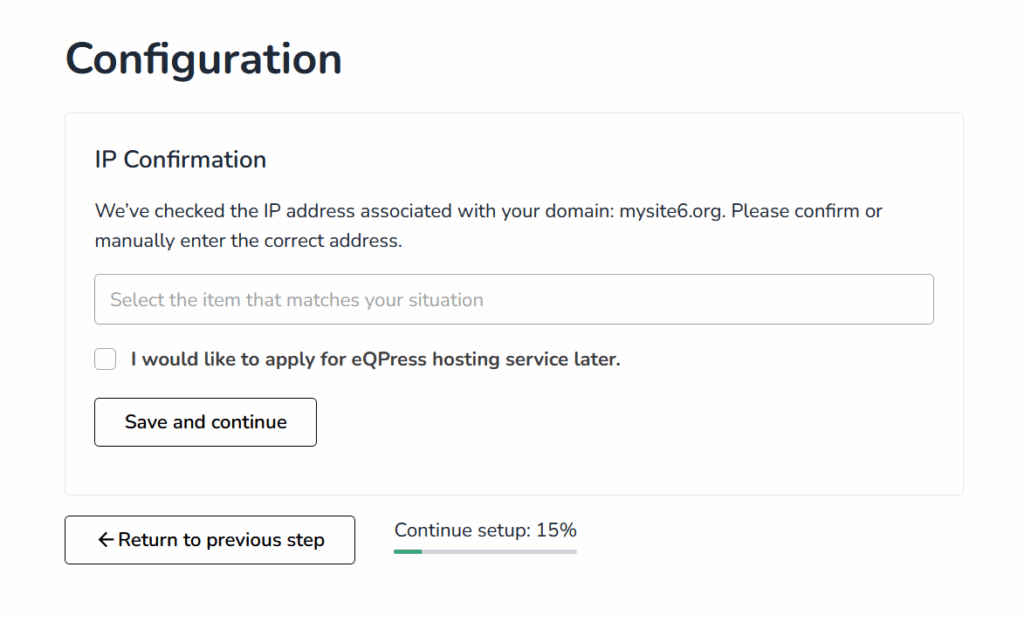
Once the client survey is complete, the initial setup screen will prompt you to confirm or input your website’s IP address.
If you are unsure of your IP address, you could use a DNS checker locally or a online DNS checker by typing in your website domain name, to obtain the IP address (A Record) in the DNS query results.
The IP address will consist of four sets of numbers separated by dots, for instance: 173.254.238.77. Please avoid entering an IPv6 Address (identified by the presence of a colon).
Kindly be aware that if you are migrating from other CDN services, the IP address that Deflect auto-populates may not be accurate. Consequently, you may need to reach out to your hosting provider to obtain the correct IP address of your server.
Should you be uncertain of your IP address, Deflect provides the option to include it at a later time. You just need to choose the selection that suits your circumstances.
Please be aware that if you defer setting up the IP address and later direct your DNS nameserver to Deflect before submitting the correct IP, your website will become inaccessible.
- I don’t have a web server yet, but will have it soon
- I have a web server, but don’t know the IP address
- Other (Please explain)
For clients without a web server or IP who wish to apply for the eQPress hosting service, please tick the checkbox to indicate your intent. However you are still required to apply once you have access to Deflect dashboard.
DNS settings #
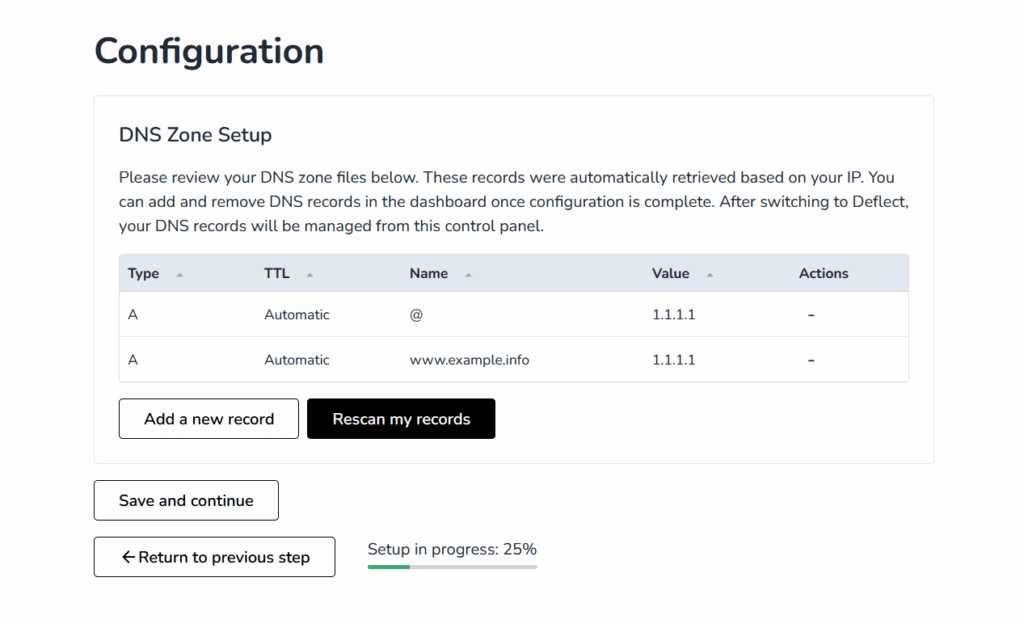
At this point, the Deflect system has completed a scan of your website’s DNS settings. The results will be displayed on this screen, providing you the opportunity to make alterations and confirm them.
However, bear in mind that this scanning process may not be perfectly accurate. Hence, it is crucial that all pertinent DNS records are represented. Recognizing the fact that every domain possesses its own records, a brief explanation is provided below for your convenience.
- A record serves as the primary record for the domain, specifically representing the IP address you inputted in the preceding step. Alternatively, it could represent a subdomain record, like ftp.example.com.
- CNAME record typically serves as an alias for your domain, enabling user to access your site by via alias such as www.website.com.
- MX record is essential for email delivery, typically comprises multiple records with varying priority values. It is critical to maintain the integrity of this record to ensure uninterrupted email delivery.
- TXT record is an record that is appended to a domain. It is frequently used to verify domain ownership and establish a DMARC record for email delivery.
It is highly recommended to review your DNS zone records against your DNS zone file on your current DNS manager, ensuring nothing is omitted or incorrect. Once you are confident everything is accurate, click the ‘Save and Continue’ button to advance to the subsequent stage.
Deflect Protected Subdomains #
Deflect doesn’t automatically protect the subdomains listed in your DNS record. For subdomains to benefit from Deflect protection, you need to register it as a separate site by clicking on the Add a new website button, after your completed setup for your primary domain.
For instance, suppose you’ve registered the website example.com on Deflect and now need protection for blog.example.com under Deflect.
To guarantee uninterrupted service to blog.example.com when you point your nameserver to Deflect, it is recommended to preserve the A record of blog.example.com in your DNS zone file throughout the Deflect setup process. Once the setup for your website is approved and complete, you can then delete the DNS record of blog.example.com.
Simultaneously, you can register it as a new website under Deflect’s protection. The subdomains will be approved automatically, ensuring little to no downtime.