Skip to the content
DeflectDeflect
  • Solutions
    • Website Security
      • Caching
      • Encryption
      • On premise
    • Deflect Labs
      • Baskerville
      • Investigations
    • eQPress
  • Pricing
    • For business & individuals
    • For non-profits
  • Partners
  • Resources
    • Terms of service
    • Privacy notice
    • Documentation
  • About
    • News
    • Principles
    • In the media
    • Deflect clients
    • Testimonials
  • Login
  • Contact
  • Sign up
  • en
    • fr
    • es
    • pt

eQPress Hosting

16
  • eQPress Limitations
  • Overview of eQPress Hosting
  • Create a website on eQPress
    • How to create an empty WordPress site on eQPress
    • First steps with your eQPress site
  • Troubleshooting
    • You updated your site but still see the old one?
    • Still waiting for DNS to be updated and want to see your site?
    • Your DNS has been updated but you still can’t see your site?
    • When you try to open your website you only see a white screen?
  • Secure your eQPress website
    • Antispam recommendations
    • Protecting your WordPress website
    • Removing the WordPress “admin” user
    • Securing your site with HTTPS
  • Manage your eQPress website
    • Resources for learning WordPress
    • How to make your site temporarily inaccessible
    • eQPress Console: enhancing your WordPress admin panel
  • Migrate your website to eQPress
    • How to migrate your WordPress site

Registration & Setup Process

5
  • Step 1 – Register
  • Step 2 – IP and DNS setup
  • Step 3 – Admin Credentials
  • Step 4 – HTTPS/TLS
  • Step 5 – Finalize

Introduction

1
  • Get Started

Control Panel & Dashboard

22
  • Troubleshooting
    • How-to: Update your origin server IP with Deflect
    • How-To: Secure your origin server by allowlisting Deflect Edge IP
    • Troubleshooting SNI and 421 Misdirected Request
  • Website Settings
    • Labs Tab
    • Billing Tab
    • Users Tab
    • Settings Tab
    • Security Tab
    • Cache Tab
    • Baskerville Tab
    • HTTP/TLS Tab
    • Hosting Tab
    • DNS Records Tab
    • Stats Tab
  • HTTPS/TLS support
    • Enable HTTPS connections to your website under Deflect
    • How TLS/HTTPS works on Deflect
  • Report a DDoS Attack
    • Challenging Requests
    • Reporting an Attack
  • General
    • Contact Deflect Support
    • Two-Factor Authentication
    • My Account
    • Deflect Protected Websites
View Categories
  • Home
  • Docs
  • Registration & Setup Process
  • Step 3 – Admin Credentials

Step 3 – Admin Credentials

< 1 min read

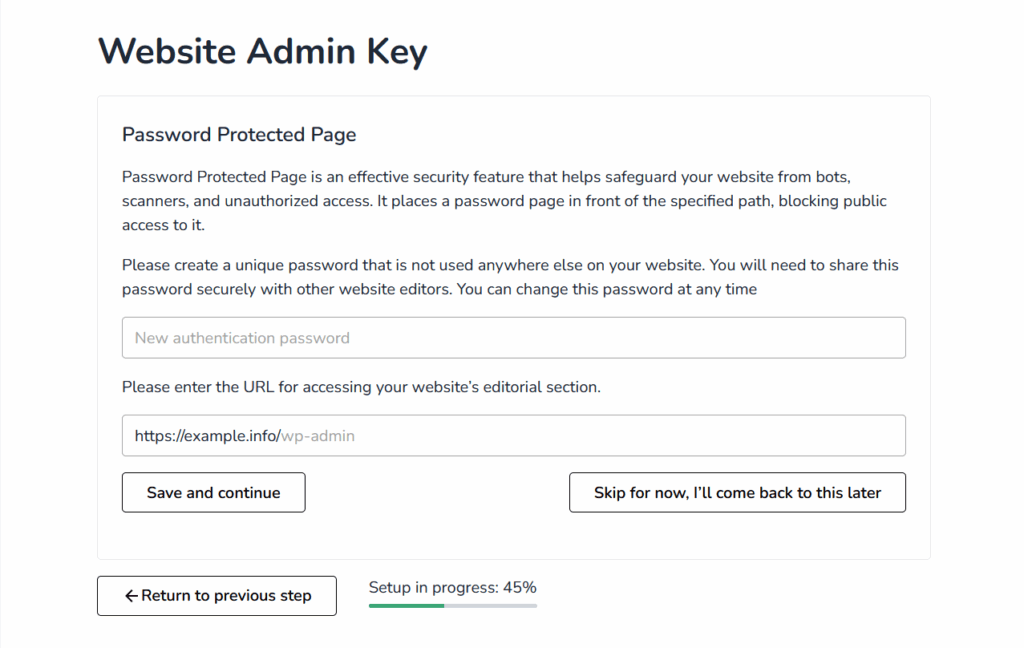
You have the ability to set a password to enhance the security of your website’s admin panel. Deflect will protect your admin panel with a password protected page. This password should be shared with administrators or editors requiring access to the safeguarded page.

Adding a password-protected page with an Admin key enhances your website’s security and prevents editors from viewing the cached version of the website after publishing a new post. More detailed information about this feature can be found on this page.

Specify your website’s login URL. For example, default URL for the following web content systems editorials are:

  • WordPress: /wp-admin
  • Drupal: /admin
  • Joomla: /administrator

Copy and paste whatever login URL is appropriate for your website, you only need to put in the URL that appears after the domain name. It should not include any hashtag (#) or question mark (?).

password_protected_page.png

Resetting the password #

You will be able to create a new password in Deflect dashboard should you forget or wish to change it.

Updated on August 27, 2025
revised

Is it helpful?

  • Happy
  • Normal
  • Sad

Share This Article :

Step 2 – IP and DNS setupStep 4 – HTTPS/TLS
Table of Contents
  • Resetting the password

© 2026 Deflect

Powered by WordPress

To the top ↑ Up ↑