The last step to register your website on Deflect involves different procedures for non-profit and business websites.
For non-profit websites, our team will assess your eligibility within approximately 24 hours or less. Conversely, business websites are automatically onboarded by our system within a range of 10 to 30 minutes.
Once the setup is finalized, an email notification will be sent to you instructing you to alter the NS Records for this domain and redirect them to Deflect.
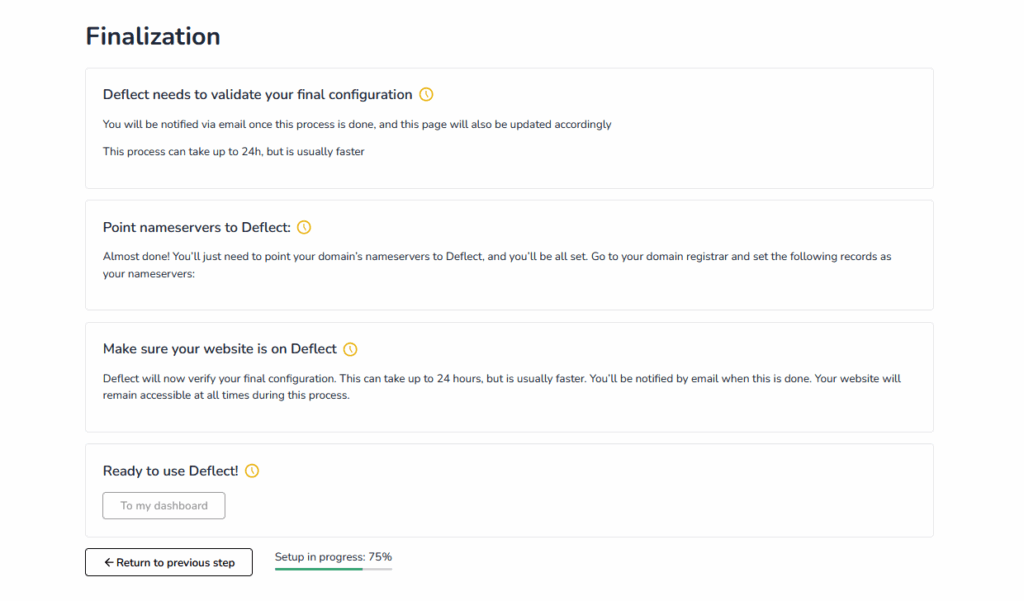
Pointing Nameserver To Deflect #
You are now required to update the nameserver (NS) record of your domain to Deflect. This task is carried out with your DNS provider. Sign into your DNS hosting account and search for the DNS zone file or DNS manager. Here you’ll locate the nameserver record settings.
Usually, your DNS provider is where you register your domain. If you’re unsure of where to find them, try looking there or contact your website hosting provider.
DNSSEC #
Deflect does not support DNSSEC, you must disable it before you point your nameserver to Deflect.
Flushing DNS Cache #
Once your have updated your nameserver, you can speed up the DNS propagation by flushing DNS cache on Google: https://developers.google.com/speed/public-dns/cache
Generating SSL Certificate #
Deflect system will automatically detect your NS record update and begin to generate Let’s Encrypt SSL certificate. We can only start this process at this stage, as the NS record update is necessary to prove domain ownership to Let’s Encrypt.
During this procedure, there’s a chance your website may temporarily show an SSL certificate error for approximately 5 to 10 minutes. Hence, it’s advisable to implement the NS record update during time of low traffic.
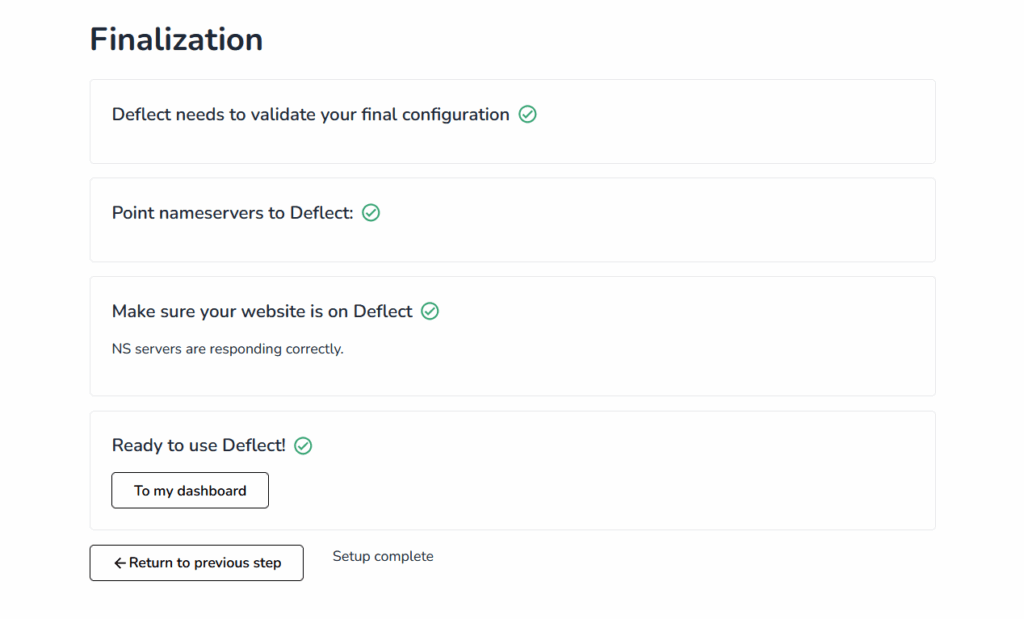
When we have completed the set-up this screen will change to:
Proceed to the Control Panel guide to learn how to use the Deflect dashboard.