Skip to the content
  • Solutions
    • Website Security
      • Caching
      • Encryption
      • On premise
    • Deflect Labs
      • Baskerville
      • Investigations
    • eQPress
  • Pricing
    • For business & individuals
    • For non-profits
  • Partners
  • Resources
    • Terms of service
    • Privacy notice
    • Getting Started
  • About
    • News
    • Principles
    • In the media
    • Deflect clients
    • Testimonials
  • Login
  • Contact
  • Sign up
  • en

Introduction

1
  • Get Started

Registration & Setup Process

5
  • Step 1 – Register
  • Step 2 – IP and DNS setup
  • Step 3 – Admin Credentials
  • Step 4 – HTTPS/TLS
  • Step 5 – Finalize

Control Panel & Dashboard

18
  • General
    • Contact Deflect Support
    • Two-Factor Authentication
    • My Account
    • Deflect Protected Websites
  • Website Settings
    • Billing Tab
    • Users Tab
    • Settings Tab
    • Security Tab
    • Cache Tab
    • Baskerville Tab
    • HTTP/TLS Tab
    • Hosting Tab
    • DNS Records Tab
    • Stats Tab
  • Report a DDoS Attack
    • Challenging Requests
    • Reporting an Attack
  • HTTPS/TLS support
    • Enable HTTPS connections to your website under Deflect
    • How TLS/HTTPS works on Deflect

eQPress Hosting

16
  • eQPress Limitations
  • Overview of eQPress Hosting
  • Create a website on eQPress
    • How to create an empty WordPress site on eQPress
    • First steps with your eQPress site
  • Migrate your website to eQPress
    • How to migrate your WordPress site
  • Manage your eQPress website
    • Resources for learning WordPress
    • How to make your site temporarily inaccessible
    • eQPress Console: enhancing your WordPress admin panel
  • Secure your eQPress website
    • Antispam recommendations
    • Protecting your WordPress website
    • Removing the WordPress “admin” user
    • Securing your site with HTTPS
  • Troubleshooting
    • You updated your site but still see the old one?
    • Still waiting for DNS to be updated and want to see your site?
    • Your DNS has been updated but you still can’t see your site?
    • When you try to open your website you only see a white screen?
View Categories
  • Home
  • Docs
  • Control Panel & Dashboard
  • General
  • Two-Factor Authentication

Two-Factor Authentication

1 min read

Deflect encourages you to protect your account with two-factor authentication.

Two-factor authentication (2FA) is a security mechanism that requires user to provide two authentication factors to confirm their identity. This can be contrasted to single-factor authentication, or SFA, which only requires one factor from the user, such as a password.

While enabling 2FA is not obligatory, it does provide additional protection to your account. Logging in with 2FA requires a code along with your username and password, this confirms your identity to us.

Enable 2FA #

two-factor-authentication-in-settings

To enable 2FA, navigate to settings under my account, and locate the Two-Factor Authentication block.

By clicking enable, Deflect will display a scannable QR code which automatically configures 2FA mobile apps such as Google Authenticator.

two-factor-authentication-setup.png

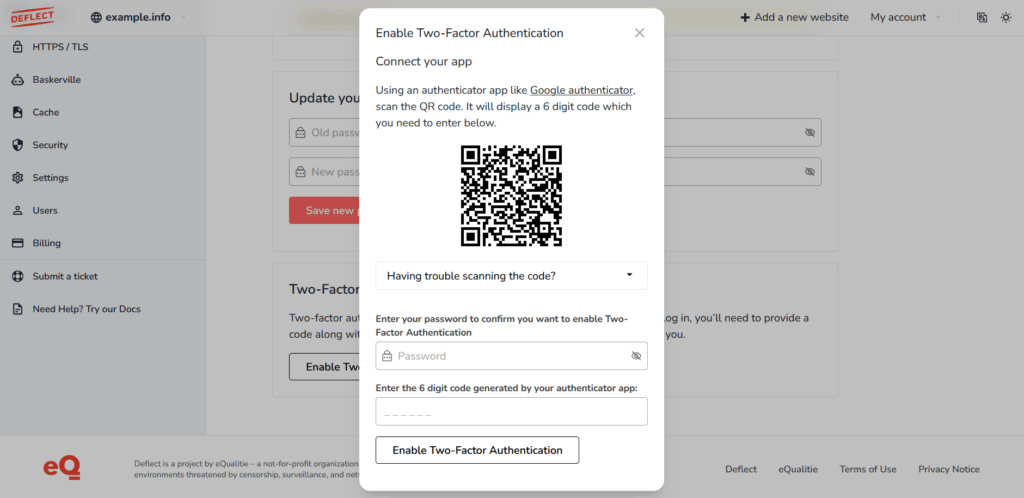
After scanning the QR code, a 6 digit code will be displayed on your 2FA application. You need to enter the code to complete 2FA setup.

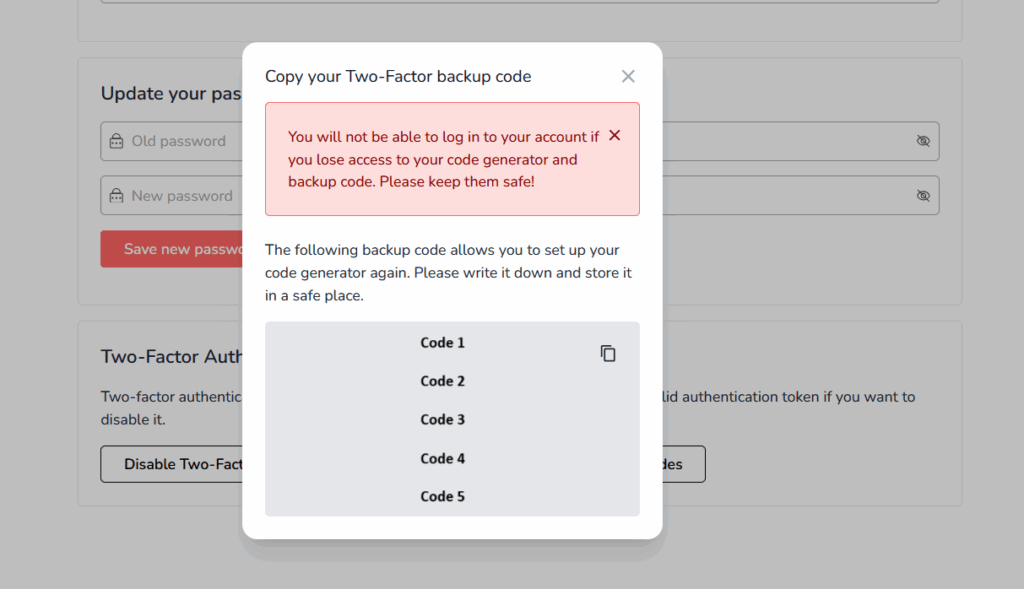
A backup code will be shown, which serves as a replacement code in case you lose access to the code generator. Please write it down and store it in a safe place.

two-factor-authenticaiton-backup-codes

Login with 2FA #

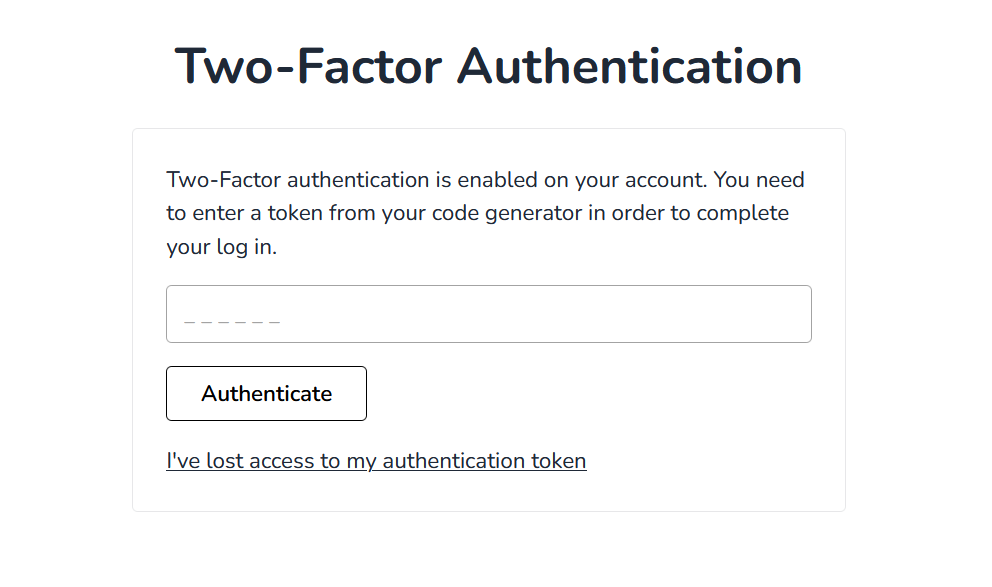
Users with 2FA enabled will be automatically redirected and prompted for their 2FA code before they are log in to Deflect.

two-factor-authentication-approval-code-asked

Disable 2FA #

Should you decide to deactivate 2FA at any time, you will need to enter your TOTP for security, which can be generate using the same authenticator app you used to activate 2FA.

Fill in the TOTP in the disable two-factor authentication form. Two-factor authentication will be disabled upon submit.

Updated on August 12, 2025
revised

Is it helpful?

  • Happy
  • Normal
  • Sad
Share This Article :
Contact Deflect SupportMy Account
Table of Contents
  • Enable 2FA
  • Login with 2FA
  • Disable 2FA

© 2025

Powered by WordPress

To the top ↑ Up ↑